WhitePanther’s Mail Drafting feature lets you send emails from connected Gmail or Outlook accounts directly inside the platform. The compose window includes standard mail fields, AI-powered assistance and scheduling tools so you can write, attach files and send without leaving your workspace.
In the left navigation bar, click Mail Drafting. This opens the mail dashboard with your compose panel on the right side.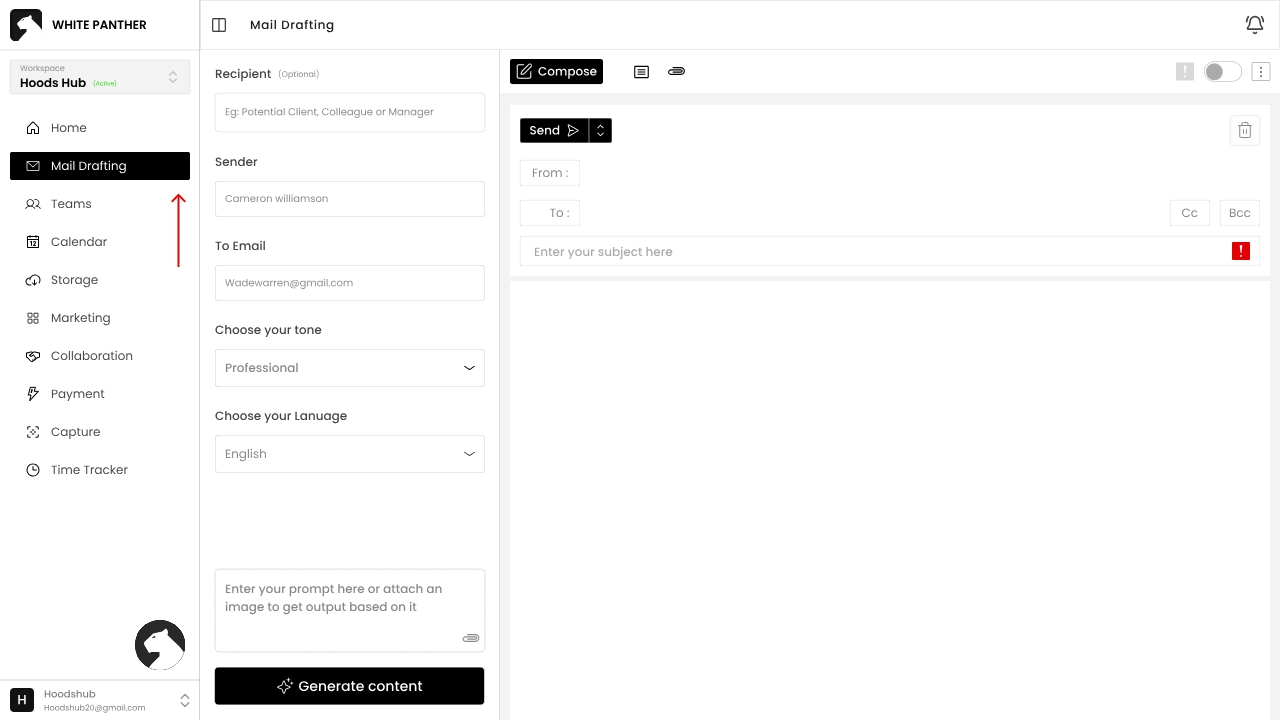
a. Select the Compose button (top of the message area).
b. A blank draft opens with the From, To, Cc and Bcc lines, a subject line that reads “Enter your subject here” and a large message area.
a. Sender: If you manage multiple sending identities, fill in the Sender field on the left (e.g., Marketing team or Developer).
b. To Email: Enter the recipient’s address. You can add additional recipients with Cc or Bcc by clicking the small Cc or Bcc buttons next to the “To” line.
c. Recipient (optional): A field labelled Recipient appears above; use it to note the type of recipient (e.g., Potential Client or Colleague), though this does not send any email.
a. Type the subject in the Enter your subject here box.
b. Click inside the large white message area and begin typing your email body. You can format text using the editor’s toolbar if available, or you can use AI-generated content (see Guide 2).
a. Beneath the recipient fields, you’ll see drop-downs labelled Choose your tone and Choose your Language.
b. Select a tone such as Friendly or Professional, then choose your preferred language (see Guide 2 for details).
a. When ready, click Send to deliver immediately.
b. A downward arrow next to the Send button reveals a menu with Send and Schedule send options.
c. Choose Schedule send to pick a future date and time (see Guide 3).
a. Use the paper-clip icon above the message area to upload attachments.
b. Selected files appear below the editor.
c. You can remove any attachment by clicking its × icon.
a. A trash-can icon at the top of the compose window lets you delete the draft if you no longer need it.
WhitePanther integrates AI to help you craft polished emails. You can specify a tone and language and even generate a complete draft from a prompt. These tools ensure consistent messaging and save time when composing repetitive or complex emails.
In the Mail Drafting page, locate the Choose your tone drop-down in the left panel. Click it and select a tone that matches your message, such as Friendly or Professional. The tone guides the AI on how formal or casual the generated content should be.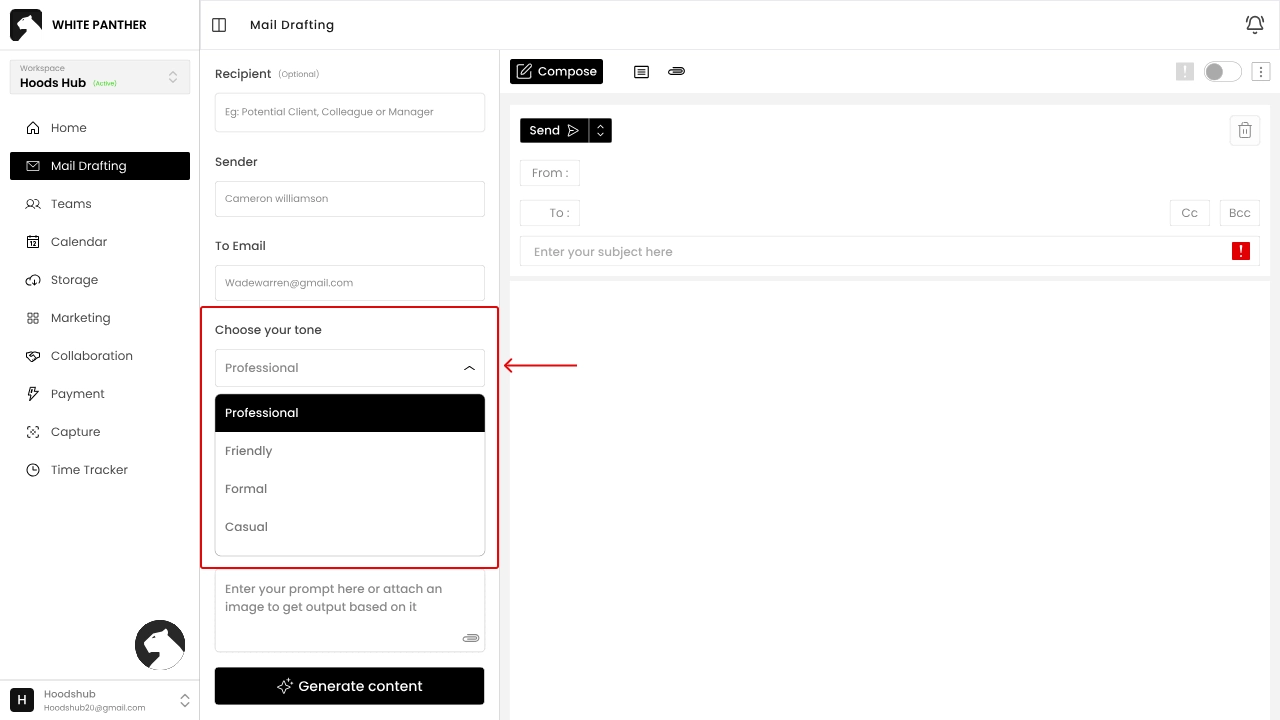
Below the tone selector is Choose your Language. Open the drop-down and pick your preferred language (e.g., English, Spanish or another supported language). All AI suggestions will be generated in this language.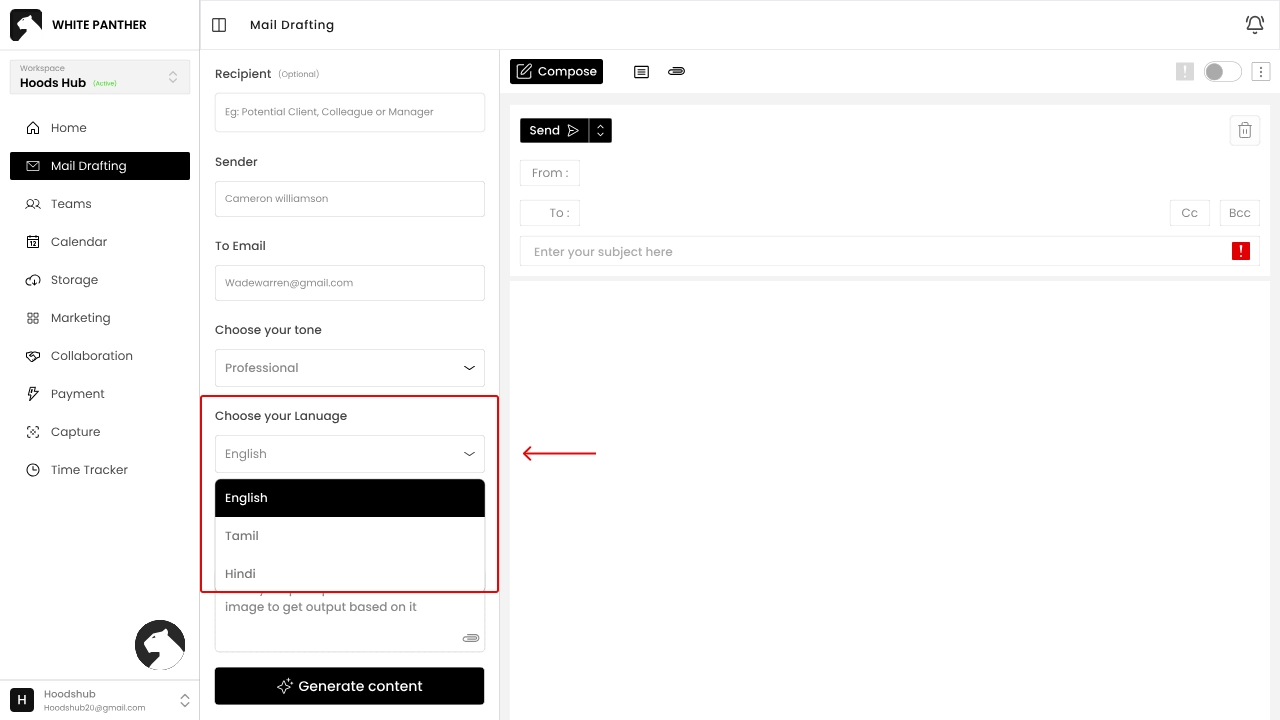
In the box labelled Enter your prompt here!!! (bottom of the left panel), describe the content you need — for example:
“Follow-up message to a client about project status.” Click Generate. WhitePanther’s AI drafts a message that appears in the email body.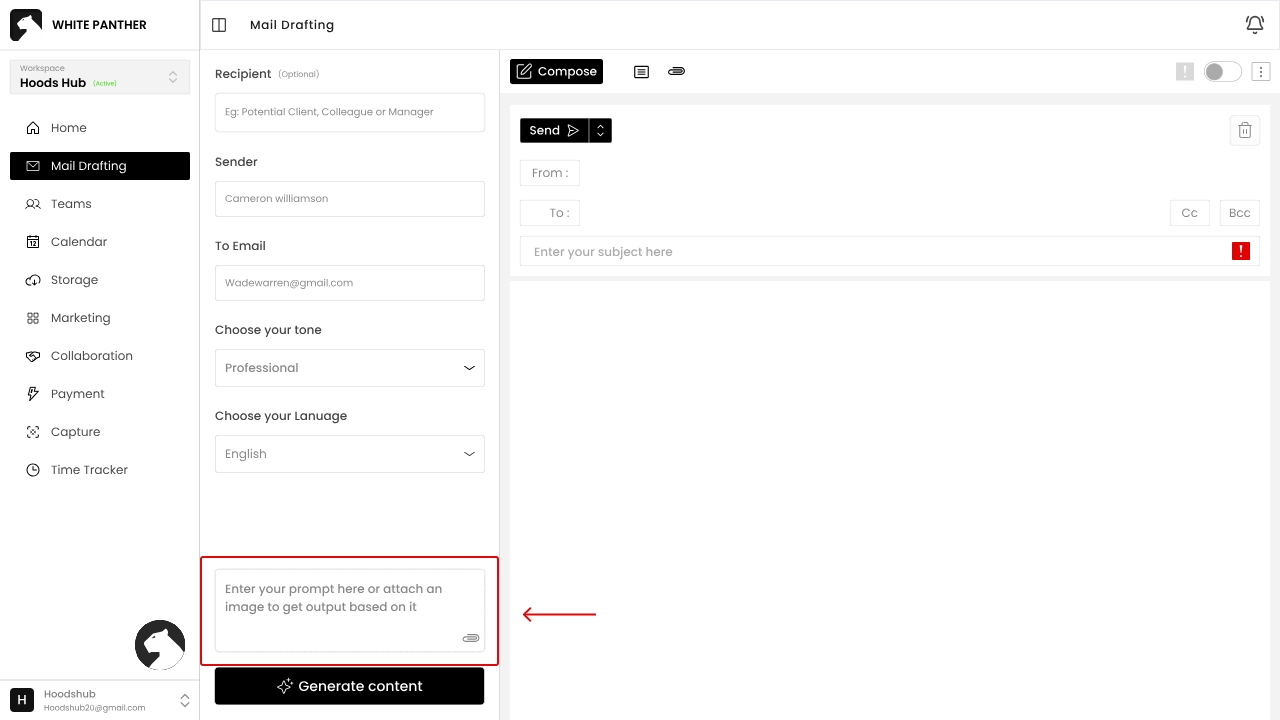
You can still edit the generated text manually.
a. Read through the AI-generated content to ensure it conveys your message.
b. Adjust any wording as needed.
c. You can change the tone or language and click Generate again to produce a different version.
a. The AI generator is optional; you can ignore it and type your own text.
b. It is especially useful for brainstorming or when you’re short on time.
WhitePanther’s compose window offers quick tools for adding files and scheduling delivery. Attachments can be added from your computer, and emails can be sent immediately or scheduled for later.
In the compose window, look for the paper-clip icon near the top toolbar (usually next to the formatting or AI icons).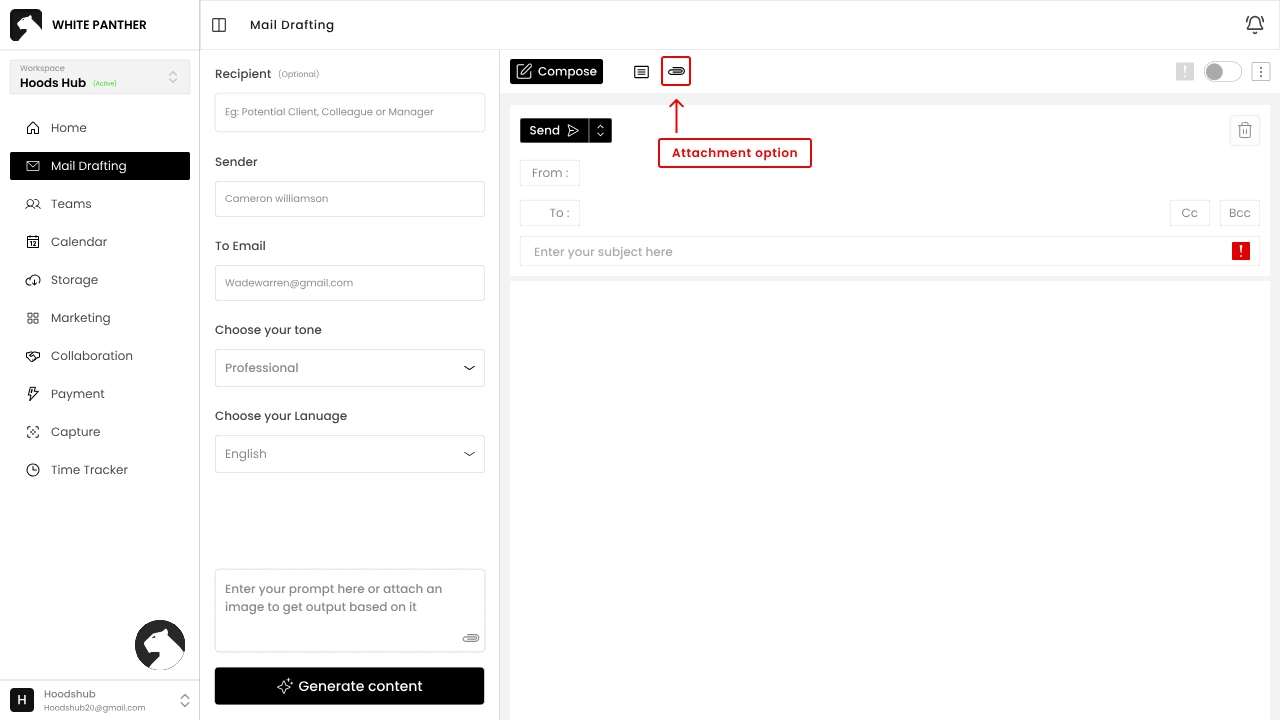
a. Click the paper-clip. A file selector opens—choose one or more documents, images or other files from your computer.
b. After uploading, each file appears as a tag below the message or content area. Each tag displays the file name and a small × button.
a. To remove a file before sending, click the × next to its name. The file will disappear from the attachment list.
To the right of the Send button is a small downward arrow. Click this arrow to display additional send options.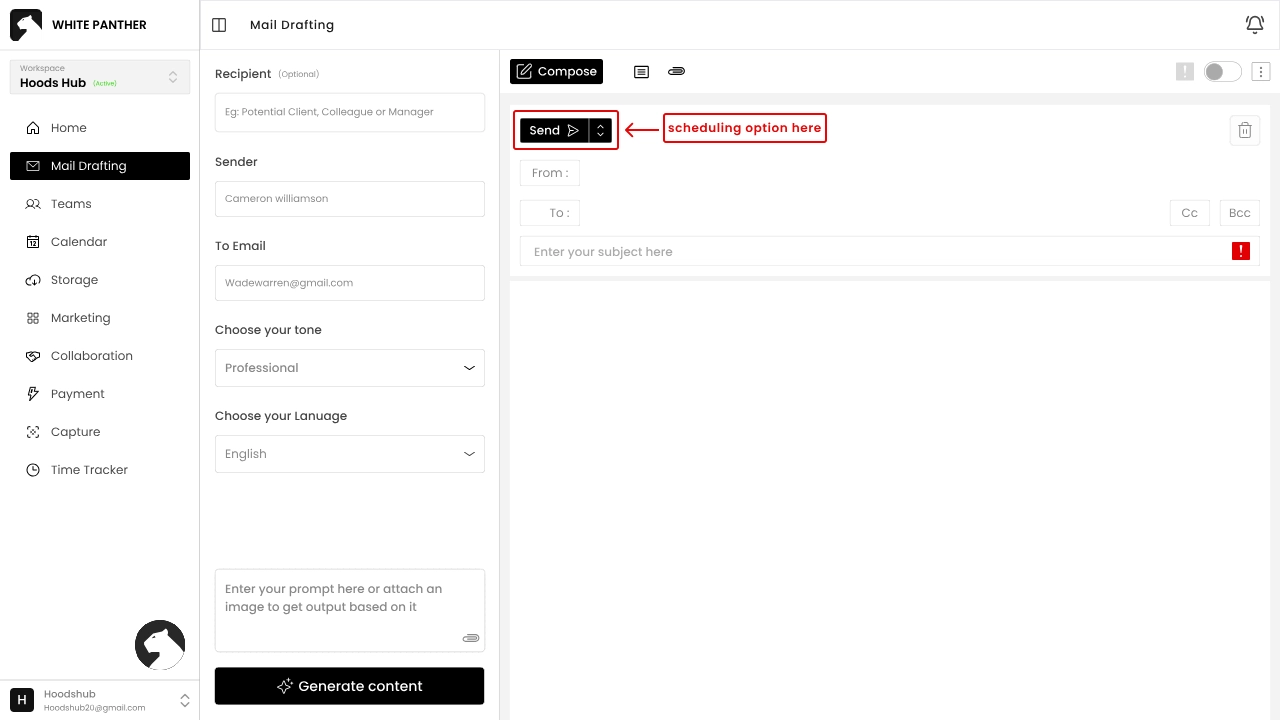
a. In the drop-down menu, choose Schedule send. A scheduling dialog opens (not shown in the basic guide).
a. Select the desired date and time for delivery. Confirm your choice.
b. The Send button will now show your scheduled time, and the email will be sent automatically at that moment.
a. To send without scheduling, simply click Send (without opening the menu).
a. Use schedule send to time your emails for recipients in different time zones or to hit inboxes during business hours.
If you frequently send similar messages, WhitePanther’s Templates feature lets you save pre-formatted drafts. You can create templates from scratch, edit existing ones and insert them into new emails to save time.
a. On the Mail Drafting page, click the Templates button next to Compose. A modal or page opens showing your saved templates and a tab for presets.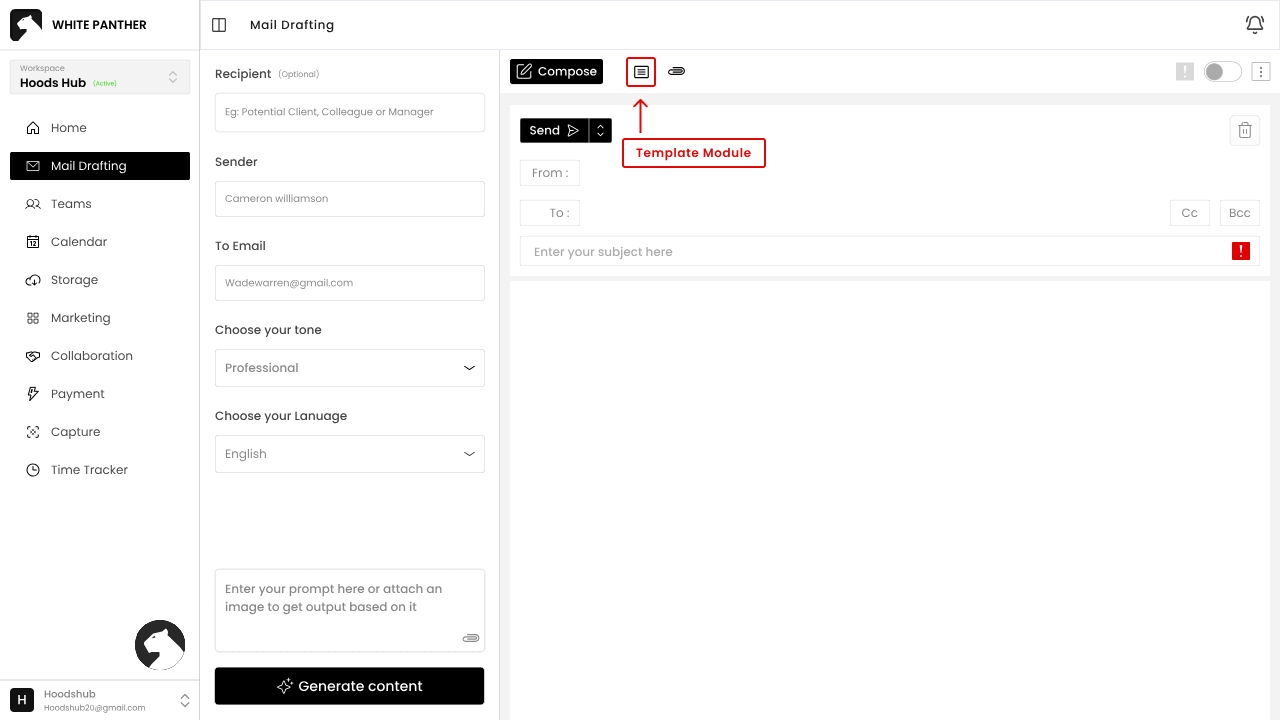
a. In the templates window, select the Create button (top-right). This opens a blank template form with fields for Template name, Subject, Recipients and Message.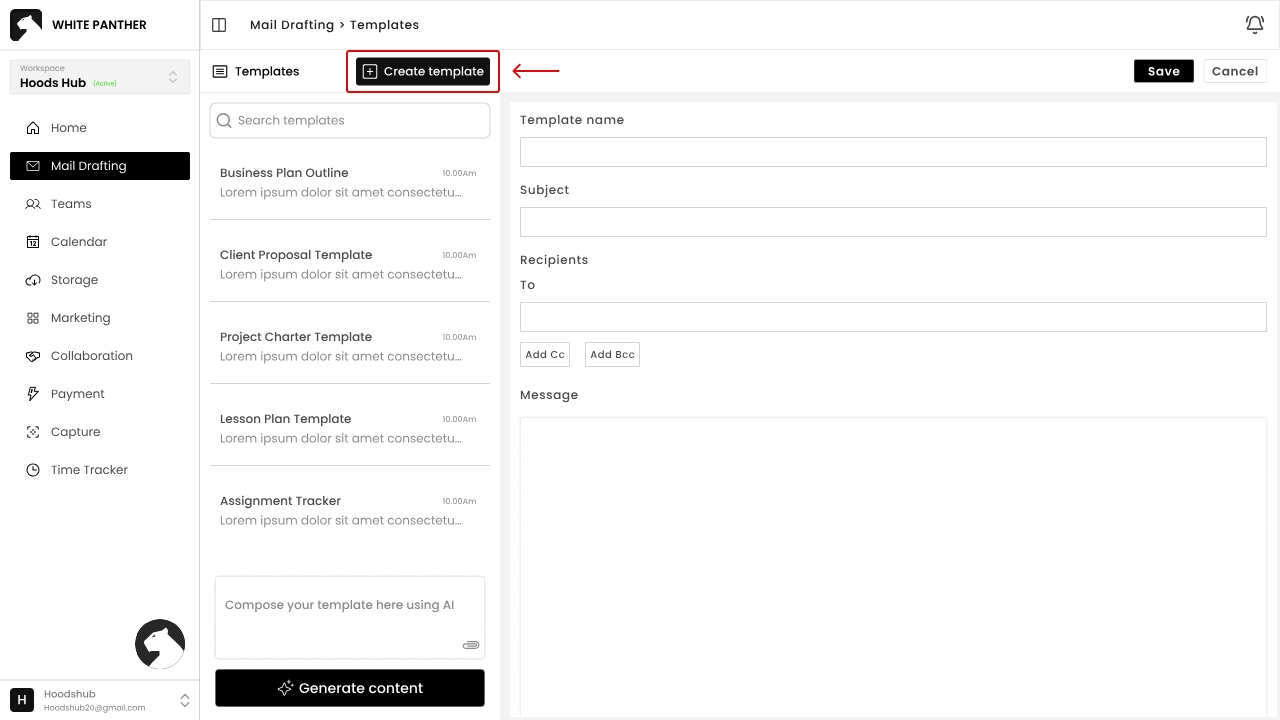
a. Template name: Give your template a descriptive name (e.g., Client Proposal).
b. Subject: Type the subject line you want to reuse.
c. Recipients: Add default recipient addresses if needed. Click Add CC or Add BCC to include those fields.
d. Message: Write the body of the email. You can use AI to generate content by entering a prompt and clicking Generate (optional).
a. When finished, click Save. Your new template appears under the Saved tab.
a. From the Saved list, click a template card. Its content will load in the right pane.
a. Update the template name, subject, recipients or message as needed.
b. Click Save to overwrite the existing version or Cancel to discard changes.
a. Some versions provide a Manage Template button, where you can rename, duplicate or delete templates.
a. While composing a new email, click the Template button.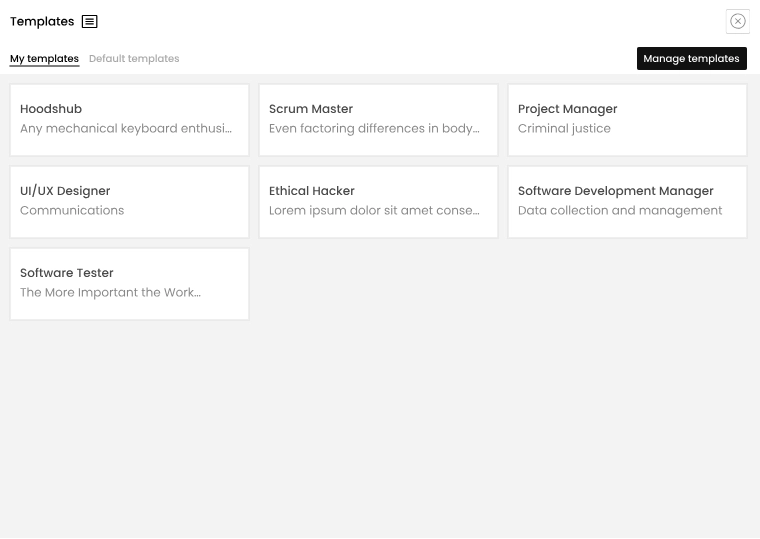
b. Select the desired template from the list.
a. The subject and message fields are pre-filled with the template’s content.
b. You can still edit the text, add attachments or change recipients before sending.
Templates automate repetitive emails. Access them via the Templates button, create your own by defining a name, subject and message, and insert them into new drafts to streamline your communication process.